There is something classical and beautiful about marble home decor. It is timeless, effortless, and functional at the same time. However, down the line, there comes a moment when your marble tops lose their factory shine, and you want to give restoration its best shot. This stone care guide includes preparation guidelines and a two-step marble restoration procedure (honing, wet-polishing, and dry-polishing) to lead you in the right direction.
These basic guidelines can help with most “average” situations of marble damage. The number of steps is unpredictable for severe marble damages and depends on multiple factors, such as the type of stone, the level of damage (depth of scratches, etching), and more. The following guidelines are not set in stone but can definitely help you if you want to tackle marble top restoration.
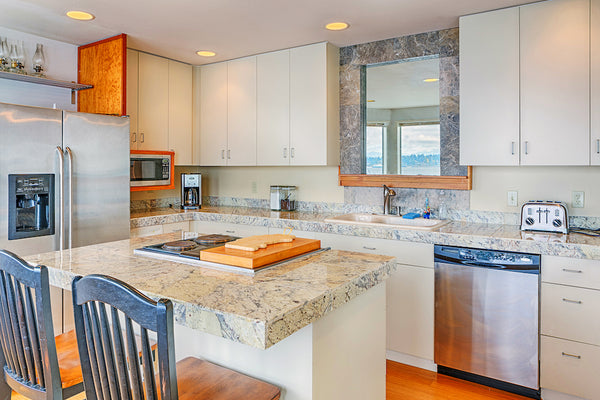
Marble
Marble is a widely used natural stone known for being highly temperamental. This relatively soft stone is quite porous, meaning you can easily scratch, damage, or stain it. By definition, it’s a calcite-based stone traded as marble. Non-calcite stones, such as serpentine and ophicalcite, are also sold as marble but are not part of its group. On the other hand, you may also encounter dolomite-based marbles.
Preparation Guidelines for Marble Top Restoration
When you’re doing restoration work on marble vanity tops, you will have to deal with encumbrances. It involves objects, such as stoppers, faucets, drop-in sinks, and backsplashes. Before starting, you should inform your customers that it is necessary to remove their faucets and stoppers. Otherwise, you can’t restore the nearby areas properly. Severe scratches or etches that reach up to spots, such as backsplashes or the rim of a drop-in sink, are impossible to restore completely. It is because of the overlapping steps that are part of a restoration job. Before you commence the restoration of marble tops, make sure to cover all surrounding areas. It will protect the nearby areas against splatters that can damage the cabinets that support the vanity and the near flooring.
Two-Step Procedure for Marble Restoration
After you take the necessary precautions, you can begin the two-step procedure that consists of honing and polishing.
1st Step – Honing
For a successful honing process, we recommend using wet-diamond honing pads. You can use them on a 4″ diameter flexible pad holder. There is no way to predict which grit size is best as a starter. For light honing, a 400 grit with some polish works well. However, in some cases, you will need to start with a 50 grit resin-bond. For the worst-case scenarios, you will need to use a 60 grit metal-bond pad. After using the 400 grit size, it’s usually possible to start with the polishing. Bear in mind that some dolomitic marbles, such as Brown Emperador (light and dark) and White Thassos, do require higher grit sizes (800 or 1500) before you polish. The principle of keeping the slurry “on the hotter side” with these types of marbles also applies for vanity tops. Delicate marbles like Botticino require a 1500/1800 grit size before polishing. In their case, the slurry needs to be lukewarm, or they will burn.
2nd Step – Polishing
When it comes to polishing, there are two options at your disposal. You can wet-polish or dry-polish using a white nylon pad on the 4″ or 7″ backer pad.
Wet-Polishing
If you choose to wet-polish your marble surfaces, the first step you need to take is to distribute some polishing powder in the middle of your chosen area. This area should not extend more than 2-4 square inches to contain the process under the polishing pads. Next, you can spray plenty of water using a spray bottle and start polishing over the wet powder with the lowest speed setting. After you polish, you can use a squeegee to check if the area is polished. Use a masonry sponge to pick up the slurry swiftly or other appropriate instruments. Move on to the following area while making sure to overlap into the precedent area.
Dry-Polishing
If you go for the dry-polishing method, you should use a dry-polish-specific powder. Sprinkle in the middle of the designated area with a little bit of the powder, where you can contain it within the polishing pad. Add water according to the level of heat you need and the type of marble stone. Pre-set your machine at around 2500 RPM, and place your polishing pad over the wet powder. While you start polishing, keep the RPM to a minimal setting by using your fingertip to control it. Rapidly spread your slurry over the chosen area, minding not to exceed 2-4 inches at a time.
As is typical with dry-polishing, the first area you do with a new pad may need to be polished again. As you go, you will notice that the amount of powder will decrease. It happens because you’re using a powder that sticks to the pad, which is active. As soon as the slurry is nearly dry (to the point it doesn’t splatter), you can pull the trigger completely and polish the entire area. It is advisable to maintain a swift pace until the surface is dried up and shined to perfection. You can continue the procedure on the adjacent area, remembering to overlap the previous one a little.
Nota Bene
When dolomite marbles are at stake, dry polishing is always the superior choice. When you try to wet-polish dolomitic marbles like White Thassos or Emperador (both the dark and light variety), achieving a factory-like sheen is not a guarantee. White Thasos may suffer the effect of “orange peel,” while Emperador may look hazy. With dolomite-based stones, you can count on dry-polishing to achieve the well-desired factory finish or even better.
These basic guidelines can aid your restoration or marble tops when you have a less severe situation at hand. If you want more in-depth information on restoring marble tops, you can shop our MB Stone Natural Stone Maintenance and Restoration book. For some superior stone knowledge, also consider attending our Stone Restoration Training Classes in Wilson, NC.