Marble countertops are beautiful and timeless, but they also have unique installation requirements that can trip up the average do-it-yourselfer. In order to help you avoid this issue, here’s a step-by-step process to help you easily install your marble countertop or backsplash in no time at all.
Getting Materials
Before you can install a marble countertop, you need to make sure you have all the necessary materials. This includes the countertop itself, of course, as well as any underlayment, adhesive, caulk, and sealant that may be required. You’ll also need tools like a saw, drill, hammer, and measuring tape. Assemble these in advance, so they’re ready when it’s time to work on your project.
In order to lay out your countertop correctly, use the measurements of your space and trace out where it will go onto cardboard or butcher paper before you get started with installation. For guidance on how best to cut this shape out for your space, consult with a contractor or carpenter about what will work best for your needs. It is important not only that it fits but also that it looks good too!
Cutting the Material
When you’re ready to install your new marble countertop, the first step is to cut the material to size. You’ll need to measure the space where the countertop will go and then transfer those measurements to the marble slab. Then, using a wet saw, cut along those lines. Make sure to wear gloves and eye protection while you’re working with the wet saw. Once the stone has been cut to size, place it in an area that can be sealed off from other work areas. Cleaning the surface: There are several ways to prepare your marble for installation. One way is by buffing it to give it a shine; another option is by sanding away imperfections like chips or small scratches so that they don’t show up once installed on the surface of your counters. Next, clean the stone with soap and water, followed by rubbing alcohol and a soft cloth or paper towel. Dry it off completely before proceeding any further with the installation steps.
Prepping the Surface
Before you can install a new marble countertop, you’ll need to prep the surface. This involves removing the old countertop, cleaning up the area, and making any necessary repairs. You’ll also need to measure the space to make sure your new countertop will fit. Measure both diagonally across the corner of the sink to find out how wide it is.
Next, use an abrasive pad or wire brush on a drill attachment to remove all adhesive residue left behind by tile or formica before installing your new marble countertop. Clean up any leftover adhesive with mineral spirits and paint thinner before applying contact cement liberally on one side of each cut piece of marble and matching edge pieces that will be glued together.
Let them dry for 24 hours before flipping them over onto their adhesive side and pressing down until they are level with each other. Then glue each seam with contact cement applied from below so that it seeps out from between the seams when pressed together – let them dry for 24 hours before proceeding with installing the new stone top!
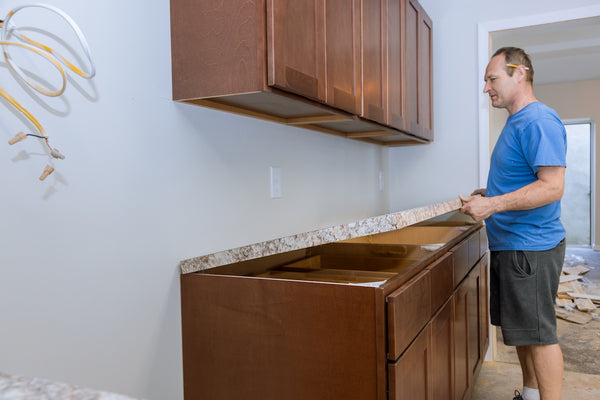
Install the Granite Countertop
- Unpack the countertop and set it in place.
- Measure the countertop to make sure it’s the right size.
- Cut any holes for sinks or appliances.
- Apply a layer of mortar to the surface.
- Set the countertop in place and secure it with clamps.
- Apply grout to the joints and smooth it out with a wet sponge.
- Wipe away any excess grout and enjoy your new countertop!
Sand the Edges
Before you can install your new marble countertop, you’ll need to sand down the edges of the old one. This will help create a smooth surface for the new countertop to sit on. To do this, you’ll need to use a handheld sander and sandpaper. Start with coarse grit sandpaper and then move to a finer one. Be sure to wear a dust mask while you’re sanding to avoid breathing in any particles.
Seal It All Up
To protect your countertop and make sure it lasts for years to come, you need to seal it properly. Here’s how to do it in seven easy steps.
- First, clean the surface with a damp cloth and let it dry completely.
- Next, apply a thin layer of sealer evenly across the countertop using a clean cloth or brush.
- Wait 24 hours for the sealer to dry completely before moving on to the next step.
- Once the sealer is dry, apply a thin layer of wax using a clean cloth or brush.
- Let the wax dry for 24 hours before buffing it out with a soft cloth.
Conclusion
Installing a marble countertop may seem like a daunting task, but with careful planning and execution, it can be a relatively easy process. By following the steps outlined in this article, you can ensure that your countertop installation goes smoothly and that you end up with a beautiful new addition to your home.